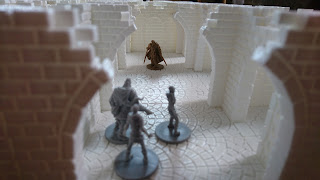
Just finished printing the various components for the first scenario of the Massive Dungeon rulebook, I also wired a bunch of LEDs that I took for some cheap tealights I bought online:
Showing posts with label dungeon. Show all posts
Showing posts with label dungeon. Show all posts
Friday, September 15, 2017
Wednesday, August 16, 2017
Building the "Massive Darkness" dungeon (part 1)
This is a 3D printed version of the tile "8R" that I designed and printed, I'm starting with the ones used in the first scenarios and over time I will add the other ones.
The various components are based on what I did already for zombicide (you can see the zombicide dungeon in my previous posts) but this time I slightly changed the walls in order to allow to use different inserts to make from time to time walls/walls with a torch/doors.
There are still few bits missing but it should be enough to give you an idea about what I'm trying to build!
Wednesday, July 12, 2017
More pics of the 3D printed dugeon
More pictures of the 3D printed dungeon I designed, I now finished printing the 6th tile and I starter adding some components in order to use all this stuff also as a city in ruin.
Sunday, April 30, 2017
3D Printed Dungeon update: Zombicide BP #1
These are a couple of pictures showing the progress on my 3D printed dungeon.
The layout is based on the scenario #1 for Zombicide black plague.
The layout is based on the scenario #1 for Zombicide black plague.
Sunday, July 31, 2016
Behold the dungeon-themed bases!
One of the project that was in my waiting list was this one about dungeon-themed base toppers for my miniatures. When the new Warhammer Quest came out I started to design some themed bases but I never had the chance to actually make them... until I got a 3D printer a couple of days ago!
These are designed to fit a 25mm base and they have the same pattern I'm using for some of the floors of my 3D printed dungeon.
Usually I go for the the plastic bases by Mantic Games: they are cheap and if you flip them over you can use to slot at the bottom to fit a magnet. Your you can see the bases with my toppers just below.
And here some happy cultists (and a couple of demons) that finally have the bases they were waiting for.
I'll probably consider making them available for sale in a while, I have this idea about some sort of webstore when the customer can pick base size (20mm, 35mm...) shape (square, round ...) and one of the patterns (or even uploading a custom one) and I can just print them on demand. But that's something for another day!
Sunday, March 20, 2016
Dungeon Saga 3D Dungeon (again!)
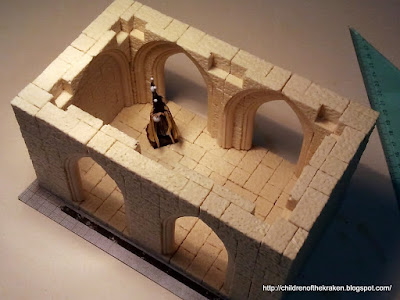
I'm tying again to build a 3D dungeon and this time it's all about Dungeon Saga!.
My plan is to start small and eventually add more rooms into it, I'm starting making enough rooms for the 1st scenario in the rulebook and then I'll add more stuff.
Since this is modular I can arrange the rooms as I like and I'm also experimenting using the rooms for Frostgrave.
I made this using the following molds from hirstarts.com:
Everything has been casted with this liquid casting resin. (I needed about 1Kg of it)
Tuesday, July 24, 2012
Dungeon Command
WOTC just released and interesting game called Dungeon Command
The game mechanics are quite interesting, there is a mix between a card game, a board game and a miniature game. Each player controls a faction and needs to wipe out the oppenent, the game is played on a modular gameboard and players use some cards in order to perform actions (no rolling dices at all!). The rulebooks is avalable for free here, for more information you can check the official website.
Tuesday, May 24, 2011
still working on the dungeon
Just finished another room, now I've done about one third of the dungeon (at least of the first layout!) and it took about 3Kg of resin to get there. Below there is a picture of the dungeon so far. I'm also looking forward to add some extra elements, I already ordered this statue and I'm preparing some extra columns for a couple of special rooms.


Monday, May 9, 2011
new weekend, new room for the dungeon
Monday, May 2, 2011
New room added to the dungeon (part 5)
The dungeon keep growing! This weekend I finished another room, it will be a crossing on the center of the map that will connect the two main sides of the game board. Below you can find a picture of the new room and another image of the map I'm using as reference (it comes from the Mage Knight Dungeon starter)


Wednesday, April 27, 2011
New room added to the dungeon (part 4)
It took me some time to cast the molds since I had some trouble with the delivery of some items but now the second room is ready. I used the pieces shown in this post, I still need to fill some gaps using some green stuff but I'm quite satisfied with the result.


Subscribe to:
Posts (Atom)


